Showing posts with label Fruit. Show all posts

October 3, 2012

Autumn Olive Jam

I was surprised that there's really only one recipe for Autumn Olive Jam floating around on the internet. While the recipe from Dreams and Bones is perfectly fine, I didn't have no-sugar-added pectin on hand and I didn't want to make a run to the store just for that. Therefore, my Autumn Olive Jam is based on the Ball recipe for berry jams (5 cups of mashed fruit with 7 cups of sugar and regular powdered pectin).


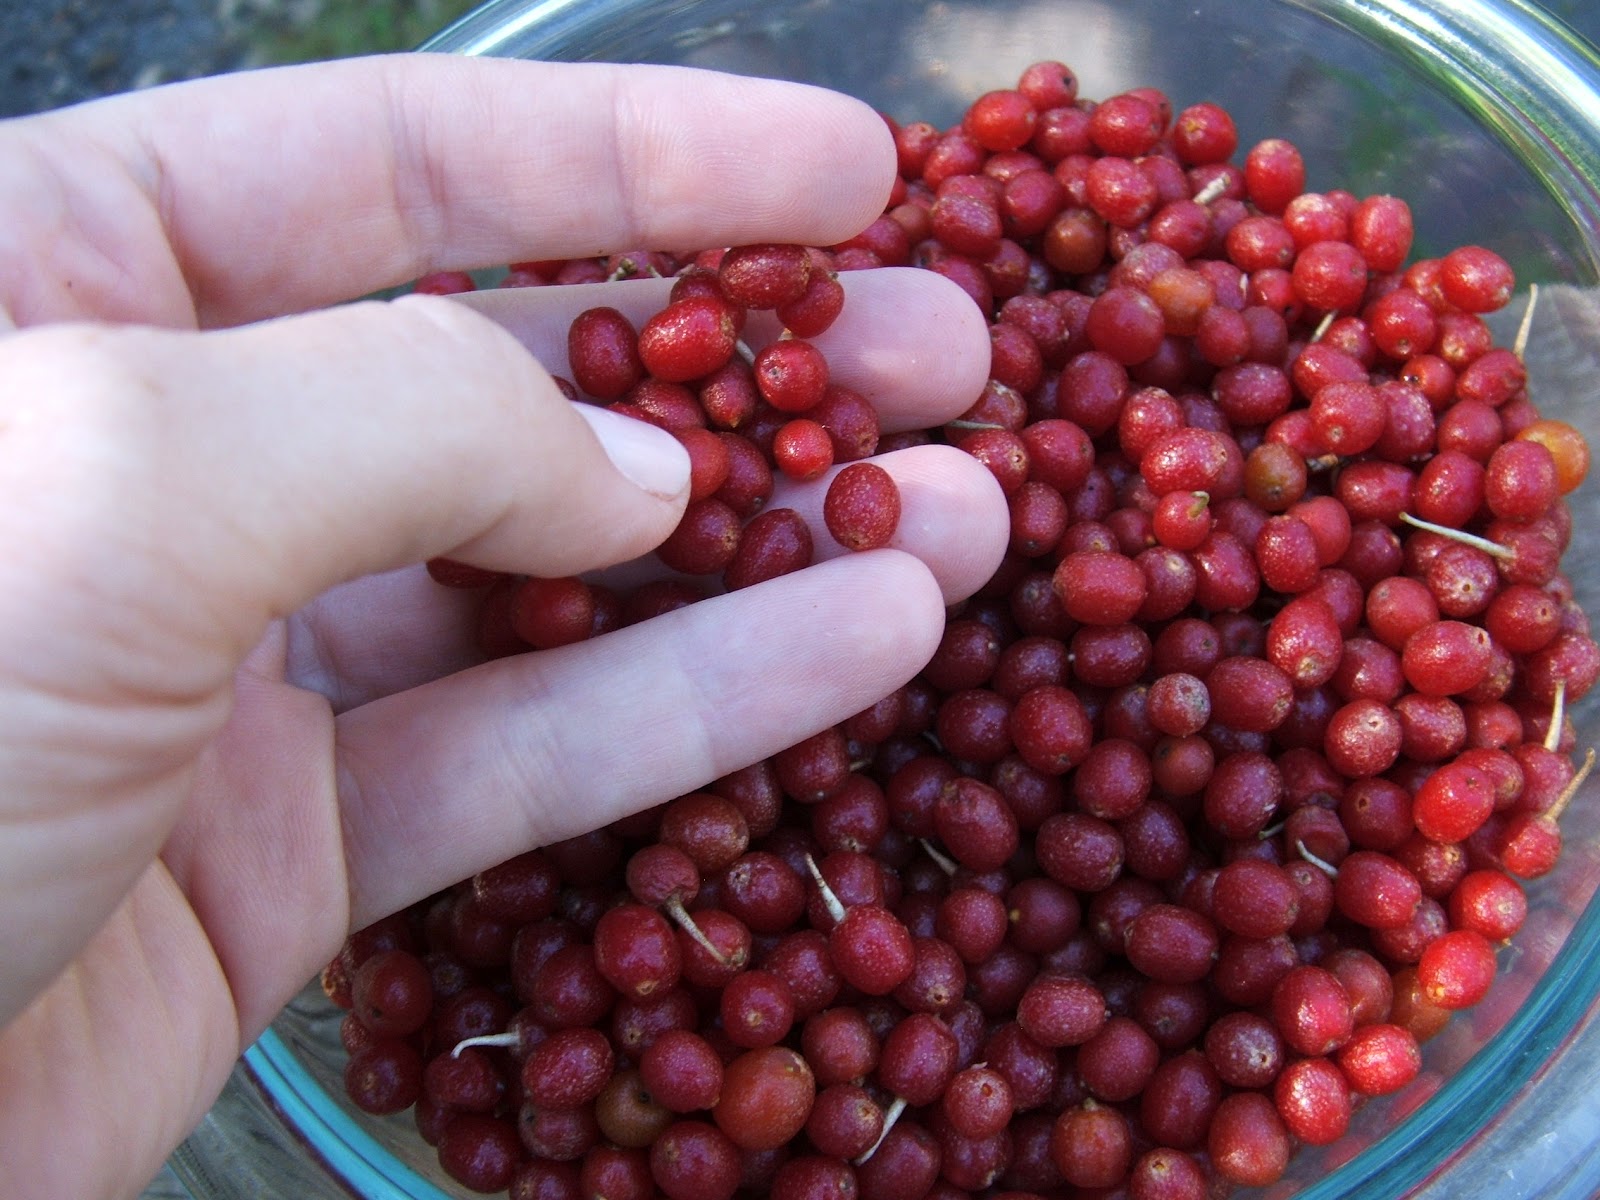
First I washed and drained the berries. Then I cooked approximately 9 cups of berries with one cup water for about 5 minutes (or until mushy). 


This glop was run through my squeezo (see it in action here, or here) to remove the seeds and twigs. I only have the apple/tomato screen that came with the food mill and the sizeable Autumn Olive seeds were pushing it to the limit, but it still worked (eventually).


The seeds were incredibly clean after only one pass through the machine. Usually I run stuff through three or four times before this happens (must be the big seeds).


I think the color and texture may be a little off-putting (it kinds of looks like ketchup, or congealed blood), but it tastes good (tart and somewhat unique).  It's definitely a novelty jam, but I think some of my like-minded friends will appreciate a jar.


October 1, 2012

Foraging for Autumn Olive

I love foraging for free food, so I was intrigued when a friend mention that he had recently tried Autumn Olive berries. After a quick internet search (to learn how to i.d. the plants) I went to one of my favorite foraging locations to hunt down some free fruit.

Autumn olive (Elaeagnus umbellata) happens to be non-native invasive species that was planted in the U.S. for erosion control and sometimes as forage for wildlife. It also happens to contain many times more lycopene than tomatoes. I didn't have a camera with me while foraging, but the leaves are metallic silver on the underside, making them fairly easy to identify. The berries also have little silver/gray scales on them when ripe, which helps distinguish them for all the other reddish berries out there in the fall.


I picked a little over a gallon, which took FOREVER! The majority of the Autumn Olive plants that I had found had a sparse sprinkling of berries...and I didn't know any better to look for better plants. It wasn't until I was almost ready to head home that I found the mother-load of berries on a tree that was smothered in them. All I had to do was put the branch inside my bag and strip the fruit of the branch.

October 5, 2011

Homemade Applesauce

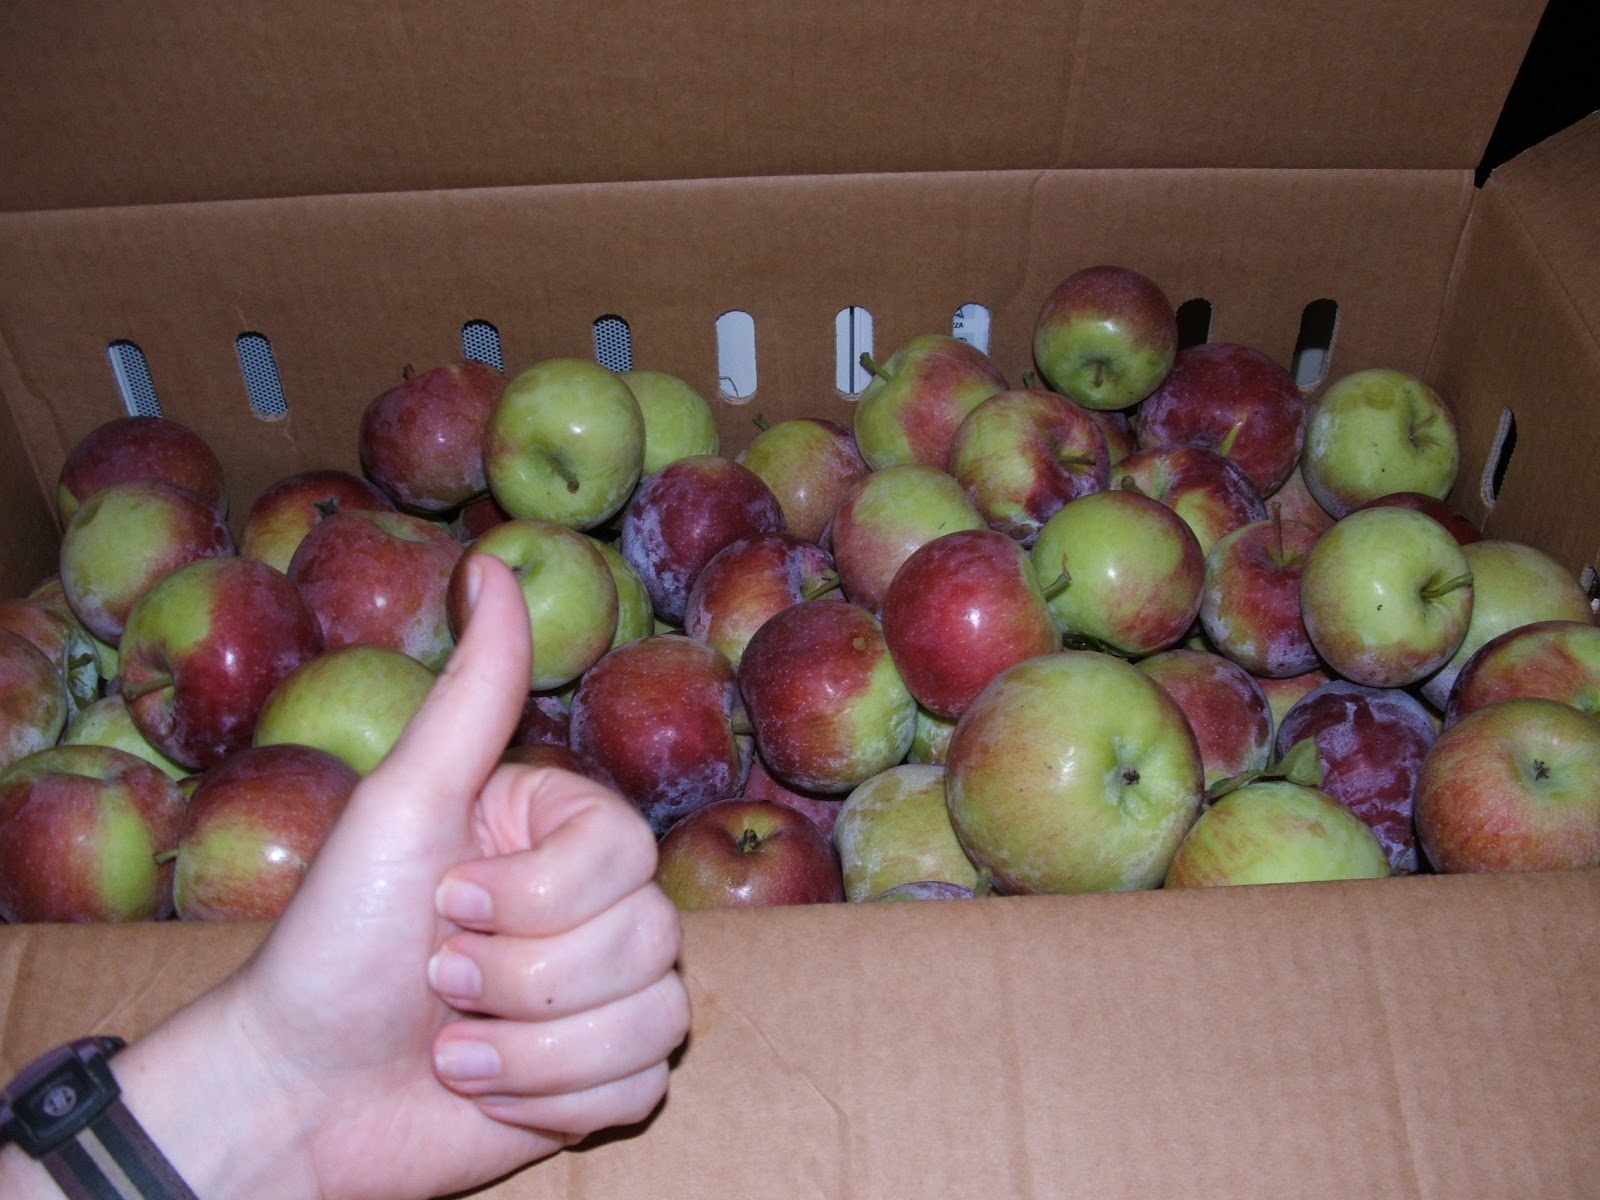
I picked up a bushel of Empire apples at the MSU horticulture farm fruit sale last Friday. I wanted to get a mixture of apples for making applesauce, but we weren't allowed to mix bushels together. I was told that Empire would be a good combination of tart and sweet (I like somewhat tart applesauce and I didn't want to have to add any extra sugar).

After looking at these photos, I'm really glad I washed the apples...look at all that bluish pesticide residue!

Since I have my awesome Roma food strainer, I didn't have to peel or core my apples. I just hacked each apple into about 8 pieces.

The apple chunks then went into a big pot with a little bit of water to simmer and soften.

After the apples were softened, I transferred them to the food strainer.

A simple turn of the crank, and the apples were pureed and the skins, cores, and seeds removed.

Here's a video of my food strainer in action (please ignore my filthy stovetop...it's canning season you know).


All the skins, cores, and seeds were separated from the apple pulp. This mess went into my compost bin. I thought about giving it to the chickens, but apple seeds contain cyanide compounds that can be bad in large quantities (such as this).

The pureed apples were then brought to a boil on the stove and then canned in water bath canner.

Two batches later and I got 8 pints and 6 quarts of applesauce! And, I still have another 8-10 pounds of apples left.

July 4, 2011

Homemade Apricot Jam

I went berry picking over the weekend, hoping to make black raspberry jam, but I was about half a pound shy of what I needed (raspberry season isn't quite going full force yet). So apricot instead!

Apricots were on sale for 99 cents per pound at the grocery store. I would have preferred to buy them at a farmer's market, but I have no clue what time of year is apricot season. I really wanted to have some fun and make jam this weekend (partially as a reward for finishing my written comprehensive exams), so I picked up 4 pounds of apricots on the spur of the moment.

Pitting and chopping apricots.

Cooking apricots and pectin.

Adding sugar and boiling.

Filling the jars with jam.

Processing the jars in the water bath canner

The finished product. It turned out a bit runny, but that's fine. It's easier to spread that way anyhow!

My recipe only called for 3.5 pounds, but I feel like I'm always cutting it close when I fill the jars. That's why I got an extra half pound of fruit. However, somehow that extra half pound turned the 8 half-pint jar recipe into an 12 half-pint jar recipe! I had to run around at the last minute grabbing extra jars and lids out of the basement to make room for the excess. I guess I didn't need to worry about cutting it close this time! That said, I think apricot jam is my favorite jam of all (although there are plenty I've never tried) so I'm pleased to have gone a little overboard!

May 17, 2011

Blackberry Plants

Here are a few more additions to my fruit garden adventure. I'm not sure on any of the cultivars, but I think I ended up with 3 different varieties of thornless blackberry. I hear that the thornless varieties aren't as tasty as the prickly ones, so hopefully these will be tasty.  I have gotten really scratched up climbing through wild blackberry brambles in the past, so maybe these will be a nice change.


May 13, 2011

Wild Black Raspberries

I have a few canes of wild black raspberry growing near my long-term compost pile. I've gotten some pretty good yields of of these plants the last two years considering I don't pay much attention to them.

This year I did pamper them a bit by clearing the brush and small trees from the area. Hopefully they'll get a bit more sun this year and produce even more fruit than before.

I was really excited to find wild black raspberries growing on my property!

These bluish-red canes are super easy to spot when walking in the woods (or even driving in a car). I've become a bit of a master at spotting wild raspberries while hiking.

If you are ever walking through the woods and spot a bramble patch, it's easy to distinguish between blackberries and raspberries (although I can't tell the difference between red and black raspberries by foliage alone). Use this mnemonic device: Blackberries stems are Blocky, while Raspberry stems are Round.

Are you a wild-berry hunter?

May 11, 2011

My Raspberry Patch

I got five raspberry plants from another grad student a couple years ago. The first year I got a few berries. The second year the plants were completely engulfed by weeds to the point where I couldn't even see the plants and forgot about them. This year (year three) I've made the effort to weed (and eventually mulch) the area.  Hopefully these will make a nice contribution to my fruit garden. Since last year, the plants have sent out runners and now there are baby plants everywhere! Hopefully they aren't too crowded and will still produce well. I plan on potting up some of the babies to give to friends.

Unexpected baby raspberry plant

Swarms of baby raspberry plants in a (relatively) weed free bed.

One of the few plants with second-year growth that didn't get mowed down by bunnies. I'm still a little confused about whether these raspberries will fruit on first-year or second-year wood, so I'm not going to do any pruning. I've also forgotten what varieties these canes are...and the fruiting is different in different varieties.

May 9, 2011

Planting Dormant Strawberry Crowns

 finally got around to planting all my strawberries. I've never grown strawberries before, so hopefully I'm doing things right. I put about 30 plants in my new fruit garden (which was my cut flower garden last year) . I'm planning on putting some straw mulch over the landscape fabric as some point (the weeds still seem to be able to get enough light through the fabric).

Bareroot strawberry crowns wrapped in moist newspaper.

I covered the planting area with permeable landscape fabric. I cut holes in the fabric to pop in the strawberry plants. I also cut some holds for a couple hyacinth bulbs (which look kind of funny now).

Planted and watered.

Some of the plants are looking better than others. I think I let the plants try out too much before planting.

May 7, 2011

Fruit Gardening (a.k.a Pie Gardening)

I'm planning on planting a variety of fruit crops this year including strawberry (first time), raspberry, black raspberry, blackberry (a first), and rhubarb (another first).  I've cleared out the majority of the oval bed that was my cut flower garden last year to make space for a fruit garden. I have a feeling that I'm going to have to make another new bed for the space-consuming rhubarb. I'm really excited to expand my pie and jam repertoire this summer!


The oval bed will become the fruit garden (assuming I can work around the existing perennial flowers).


Are you trying any new fruit crops this year?

May 3, 2011

Grow Your Own Pineapple Plant

Have you ever wondered what to do with those spiky pineapple tops once you cut them off your fruit? With a little luck, they can be rooted and grown into your very own pineapple plant. Unless you have a greenhouse or high-intensity lighting, your pineapple plant will probably never produce any fruit, but they are fun to grow anyway. The spiky foliage and blue-green color is an unusual addition to any houseplant collection.


Buy the freshest looking pineapple you can find. If the leaves are already dry and withered, you probably won't be successful. After cutting the top off of your pineapple, remove any remaining fruit connected to the top. Peel away several layer of leaves from the cut-end of the pineapple top until you have about a quarter inch of “stem” showing. You may already be able to see tiny stubby roots growing off of the stem (they were hidden between the leaves). Allow the cut-end to dry out for a couple days. You then have two options: 1) place the stem in a vase of water until roots form, then plant in soil, or 2) plant directly into soil.  I'm not sold one which way is the best (I've had them die both ways). Be prepared to try this a few times before you get one that survives.

May 1, 2011

Adventures with Rhubarb

I have never grown rhubarb before (or cooked with it).  I will be trying my hand at growing it for the first time this year. I really wish I had started more perennial crops when I first moved into my house, but I was too occupied by building raised beds my first summer (and just plain too busy the second summer).

I bought a couple of bags of 'Victoria' rhubarb roots (6 total). I was really confused at first because when I fished the plants out of the bags of peat and woodshavings the plants looked and felt like large soggy wood chips.  Being a horticulture graduate student, I knew something was wrong. There was no way they were supposed to look like this, right? At that point I got really angry at the store I bought them from...who do they think they are selling this crap to unsuspecting customers? I felt duped. I wish I had remembered to take a photo of these weird spongy things, but I was really frustrated at the time.

I called the store and explained what I had found, and they said I could bring them in for a refund.  The person at customer service seemed as confused as I was when I showed her the contents of the packages. She said that I could either get a refund or exchange them for different plants. I really really wanted some rhubarb, so I said I'd take a look at the remaining stock. I swear, only 4 bags out of about 50 had any sign of life inside of them. I was allowed to open up the packages and make sure all my plants were alive.

This is what the second batch of rhubarb roots looked like.

In the end I got my 6 plants, but I'm a little concerned about all the other people who are going to buy these things, plant the soggy woodchips in the ground, and expect something to happen.

Hopefully these woody chunks will actually root out and survive!
Related Posts Plugin for WordPress, Blogger...