Showing posts with label Seed Starting. Show all posts

May 2, 2012

Seedling Doing Really Well!

I feel like my seedlings are doing really well this year. It might be the fact that I moved my seed starting area out of the chilly basement and into the kitchen. Or it might be the soil blocks. Or maybe the brand new light bulbs. It's probably a combination of them all!

My seed starting shelf is working out great! It's a little weird having it smack dab in the middle of my kitchen, but it's also really nice being able to admire my seedlings all the time.

Foreground: some of the younger batch of tomatoes, as well as basil, eggplant, and tomatillos. Background: the cucumbers, gourds, squashes, and melons I started last weekend.

Left to Right: parsley, dill, broccoli, beets, and swiss chard.

A tray of the older tomatoes.

Another tray of older tomatoes.

I'm pretty happy with how the soil blocks have worked out. My only complaint is that some of the older blocks are starting to grow into one another at the bottom. I'm a little worried I'll have trouble prying them apart. I'm also probably going to need to transplant most of the tomatoes into bigger pots pretty soon, so using soil blocks for them may have been a waste of time. In any event, I'm amazed with how well they stay together...and it's neat being able to see the roots "air-pruning" themselves on the edges of the blocks.

February 6, 2012

2012 Seed Purchases (Part 3): Seed Savers Exchange

Back in November, Seed Savers Exchange had a 50% off sale on "last-season's" seeds. I had never ordered from them before, so I thought it was a good time to try them out. I've grown the soybean before, but everything else will be new for the 2012 vegetable garden. Here's what I ordered (and the descriptions provided by Seed Savers Exchange):


Bean, Golden of Bacau
(Phaseolus vulgaris) Donated to SSE by friends in Bacau, Romania. Very productive, 6-10" long flattened golden Romanotype beans. Excellent sweet flavor. Even when the seeds begin to form the pods are still stringless, tender, and sweet. Best for fresh use but can also be frozen. Pole habit, wax, 60-70 days.


Cucumber, Mexican Sour Gherkin
(Melothria scabra) Newly rediscovered heirloom. Produces abundant crops of 1-2" fruits reminiscent of tiny watermelons that fall off the vines when ripe. Sweet cucumber flavor contrasted by a surprising sourness, as if they are already pickled. Great for growing on a trellis. 60-70 days.

Soybean, Envy

(Glycine max) Developed by the late Professor Elwyn Meader at the University of New Hampshire. Upright 24" plants produce an abundance of all-green beans, excellent quality. Great short-season variety. 75-85 days.

Squash, Galeux d'Eysines

(Cucurbita maxima) (aka Galeuse d’Eysines, Courge Brodée Galeuse) A French heirloom squash from the Bordeaux region; noted in Vilmorin’s Les Plantes Potageres (1883). Seed carried by La Ferme de Ste. Marthe and collected by SSE member Amy Goldman at the 1996 Tranzault Pumpkin Festival. Attains weights of 10-20 pounds. Best used for beautiful table centerpieces or eaten in stews and soups. Harvest squashes slightly immature as they tend to crack. 90 days.

Pea, Golden Sweet

(Pisum sativum) Collected at a market in India. Tall 6’ plants with beautiful bi-colored purple flowers and bright lemon-yellow pods. Best eaten when small, excellent for stir-fry. Seeds are tan with purple flecks, can be dried and added to soups. One of the few yellow edible podded peas in SSE’s collection of 1,200 peas. Edible podded, 60-70 days.

February 3, 2012

2012 Seed Purchases (Part 2): Baker Creek Heirloom Seeds

This past Christmas, I asked my parents for a gift certificate to either Pinetree Garden Seeds or Baker Creek Heirloom Seeds. They chose Baker Creek and gave me $25. Strangely enough, I had a difficult time spending all $25 (mainly because most of the varieties on my wish list were cheaper at Pinetree), but eventually I found enough things to use the entire gift certificate. I've grown the fava bean before, but everything else will be new for the 2012 vegetable garden! Here's what I ordered (and the descriptions provided by Baker Creek Heirloom Seeds):


Broad Windsor Fava Bean 
75 days. Yields gourmet high-protein beans on upright nonbranching
plants. An old English favorite. 


Mammoth Red Beet
100 days. Huge, up to 20 lbs. each with large yields per acre. Highly used for livestock feed in the 1800's. Or picked small for table use. 


Tepehuan Canteen Gourd
This gourd was collected from the Tepehuan people at
Santa Rosalia, Chihuahua, a Sierra Madre mountain town
in Mexico. Green fruit are tear-drop shaped and 6”-8” tall.
They have a nice hard shell. Great for crafts 


European Mesclun Mix
Grow this mix of greens for one of the tastiest salads ever! Flavors range from sweet-mild to sour-hot-tangy, and colors come in red, purple, yellow, and green. Colorful lettuce, radicchio, arugula, endive, orach, mizuna, kale, mustard, corn salad and more. A favorite with market growers. 


Extra Dwarf Pak Choy
The perfect baby vegetable for marketing, this tiny pak choy is picked when just 2 inches tall! It has dark green, wrinkled leaves with thick, white petioles and can be used whole to make amazing salads and stir-fries! Very tender and delicious! 


Corn Salad or Mache-Verte D'Etampes
This variety was popular in 1880’s France. It
produces flavorful, deep green leaves, and the small
plants are fairly cold-hardy. In 1885 Vilmorin said,
“They bear cold weather remarkably well, and they
have the advantage of losing their freshness less than
those of any other kind while they are being brought
to market.” 


Costoluto Genovese
The fluted, old Italian favorite that has been around since the early 19th century. Fruit are rather flattened and quite attractive with their deep ribbing. This variety is a standard in Italy for both fresh eating and preserving; known for its intensely flavorful, deep red flesh. This variety has also became very popular with chefs in this country. 


White Queen
70-75 days The favorite white variety of many tomato collectors, this heirloom is said to have been introduced in 1882 by A.W. Livingston, though many people question the exact date of introduction. 4-8 oz. fruit have one of the best flavors of all tomatoes, being fragrant, fruity and intensely sweet. It's creamy white in color and very attractive. A productive variety that has become very rare. 


Garden Huckleberry
(Solanum melanocerasum) 75 days. Large purple berries that are cooked and sweetened, (do not eat raw). Great in pies; huge yields of fruit all summer long. Plant 14 inches apart. Strong tall plants do not have to be staked. Grow plants like peppers. Great for anyone wanting quick easy berries and a huge yield. Originated in Africa. 


Baker Creek includes a free (random) packet of seeds with every order. This year I got 'Red Romaine' lettuce.

February 1, 2012

2012 Seed Purchases (Part 1): Pinetree Garden Seeds

I've been ordering seeds from Pinetree Garden Seeds for years now. They are by far my favorite seed company. They have a good selection and the prices are low. I like that you can order a packet of 25 tomato seeds for $1.50 rather than having to shell out $3 or $4 for a packet of 300 seeds (when am I ever going to need 300 tomato seeds of the same variety?). All of the varieties I ordered this year will be new for the 2012 garden. Here's what I ordered (and the descriptions provided by Pinetree Garden Seeds):


Dinosaur Kale
HEIRLOOM 1885 Also known as Tuscan Black Palm or Lacinato. A unique kale with very large, rounded, well filled, meaty leaves. Plants are large, hardy, and vigorous, and the flavor is bold.


Lancelot Leek
Substantially earlier than others and of high quality. The earlier you start it, the better it will perform. Transplant to the garden in April/May and "hill up" several times for long well blanched leeks. Flavor is mild.


Rouge Vif D Etampes Pumpkin
HEIRLOOM This unique 1800s French pumpkin, Cinderella to us here in America, is popular with chefs for soup bases because its mild flavor doesn't overpower other ingredients. Fruits are flattened and concave on top, about fifteen inches across and six inches high. The skin color is a brilliant reddish orange, more dramatic than the yellow-orange pumpkins you are used to. The flavor is just great, in pies or any winter squash recipe. Plants are vigorous with 15 foot vines. 


Ailsa Craig Onion
HEIRLOOM 1887 British. This fine large onion has gained a considerable following in the past several years. Bulbs in excess of 3 pounds are possible, but the real virtue of this variety is the quality. Color is a snow-white, centers are bull's eye single, tops are vigorous, and the flavor is very sweet. Great for slicing raw. Every year that we grow it we reaffirm that Ailsa Craig is the biggest, the earliest, and the best.


Red Marble Cippolini Onion
HEIRLOOM The extremely dark red color goes to the core of the bulb. Flat onions are 1 1/2 inches wide and 1 inch high. This is a very hard onion and good keeper. Also good for braiding.


Delicata Squash 
HEIRLOOM 1894 A favorite of many Pinetree employees, Delicata is a good choice for the home gardener. The vines are relatively compact. Fruits average about eight inches in length, are half as wide, so they are a good size for a meal. Color is a creamy green with lengthwise darker green stripes. Flesh is an attractive orange and flavor is very sweet. As a bonus, Delicata is also a very good keeper for a small squash and the flavor even seems to improve as the winter passes. We have a particularly good strain of this variety.


Black Cherry Tomato
Indeterminate. Long vines are covered with distinctive, very dark purple fruit. You get the exceptional flavor of a Brandywine in a cherry tomato.


Riesentraube Tomato
Indeterminate In German the name suggests a giant bunch of grapes and that pretty well sums it up. The plant can produce 20-40 fruits per cluster. They are an elongated cherry shape with a pointed end. The flavor is quite acid, not too sweet.


January 30, 2012

Make Your Own Seed Starting Shelf

I recently saw somebody post about an awesome looking seed starting shelf sold by Johnny's Selected Seeds. It comes with the shelving unit, plastic trays for each shelf, light fixtures for each shelf, and four wide-spectrum fluorescent tubes per shelf. This particular model has four shelves...and costs $895 (plus $49 shipping)! YIKES!

I happen to be making my own seed shelf this spring, and I'm going to see how much it costs. The last few years I have started seeds in my basement (and no, I haven't had any midnight raids from the police). However, my basement is about 10 degrees cooler than the rest of the house. With the basement at only 55 to 60 degrees, my seedlings grow a lot slower than they could if they were grown at say, 68 degrees upstairs (which is what my thermostat is set to during the day). Also, I think it will be more fun having the seedlings upstairs where I can see them all the time. This might also help prevent a little watering mishap that happened with my seedling-sitter last year while I was out of town.

Last year I grew seedlings under five, 4-foot shoplights. This year I've upgraded to six, which will light three shelves. However, my shelving unit has 5 shelves, so if I ever want to upgrade to more lights, I have the option.

I will be comparing my seed starting unit with the three-shelf unit from Johnny's, which is $695 (plus $44 shipping).

Here's what I purchased to build my seed starting shelf:

  • $70: 5-Shelf Steel Shelving Unit, 72" H x 48" W x 24" D. I will be using this shelving unit in the off-season for storage in the basement.
  • $60: six, 48" shoplights. I have accumulated six of these over the last 5 years, but they've aways costed about $10 a piece. 
  • $8: three packs 48" Cool-white fluorescent tube (two-pack).
  • $14: three packs of 48" Warm-white (a.k.a. Soft-white) fluorescent tube (two-pack).
  • $3: twelve 1 3/8" eye hooks.
  • $3: twelve S-hooks.
Total Expenditure: $175
Until seed starting time rolls around, this shelf will be used as kitchen storage. I think it will be fun to have the seedlings in the middle of the kitchen!

Two cool-white and two warm-white bulbs per shelf should do the trick!

Fluorescent tubes should be replaced periodically because they get dimmer over time. I bought all new lights this year, which is expensive, but I shouldn't have to replace them for at least two years.

Comparison:

My version: 
  • $178 (could be built for even less money if you already own a suitable shelf and/or shoplights)
  • Combination cool-white/warm-white bulbs may not be as effective as wide-spectrum bulbs, but they are a lot cheaper and have worked very well for me in the past.
  • Lights can be raised or lowered using S-hooks and/or chain
  • Can be used for storage elsewhere in the house when not in use.
Johnny's version: 
  • ~$750
  •  Wide-spectrum bulbs may be more effective for plant growth
  • Adjustable shelf height
  • The shelf is on wheels and can be moved around easily
  • Shelves are not solid, but instead have rails to hold drop-in plastic trays...however, this means that the shelf can't be used for storage during the off-season.
The Johnny's version might be a little fancier, but I think I'll stick with my version for now. Just think! You could build four homemade seed starting shelves for less than the price of one pre-fab shelf! I'll keep you updated on how well my new seed shelf works.

What kind of seed starting setup do you use?

May 23, 2011

Slow, But Steady Seedlings

I'm mildly concerned that my veggie seedlings aren't doing so great this year. Due to all the cold weather, I've had to confine most of the warm-weather crops (tomatoes, peppers, eggplants, etc) to the basement for most of the spring. My basement maintains at around 60 degrees and my fluorescent lights aren't super bright. While these conditions are fine for a time, my seedlings really need some bright natural sunlight and warm weather to bulk up before planting time.

These tomato seedlings are enormous, but that's because I got them from a greenhouse at work. I feel like this is cheating, but who can pass up free heirloom tomatoes?

My homegrown tomato seedlings, on the other hand, are much much smaller (most only have one or two sets of true leaves at this point. Some of my other tomato seedlings (I'm too embarrassed to show them) are even smaller due to an unfortunate watering mishap that happened during my conference in Iowa (in short, some of my tomatoes got a tad bit dry, which was exacerbated by the heating mat, and I lost probably 30-50% of my tomato seedlings. Oops! That said, I think I'm almost back on track now. The youngest set of seedlings (the ones I can't show you) have two more weeks to shape up before planting time.

My first foray into favas seems to be going well. All but one seed germinated, which had some weird maggot disease upon investigation.

The basil I started a week or so ago is looking good too, although I don't know if it will be ready by farmer's market time.

This year's jarrahdale pumpkins are doing well too.

In fact, all of my squashy crops seem to be doing well...with the exception of some of the gourds, which refuse to germinate. I've been growing ornamental gourds for several years now and the germination rates are always very variable (I'm talking over a month apart for the same cultivar, from the same seed packet, grown under the same conditions).

May 22, 2011

Halfway House

Here's what my deck looks like this time of year, every year.

Lots of seedlings hardening off, free plants from work, stuff for the farmer's market, empty pots, and the all-purpose kitty litter buckets that I seem to accumulate even though I don't have a cat.

And this isn't even all of it! I have more on my picnic table and more in the basement.

I'm only slightly addicted to gardening...

May 19, 2011

Squashy Crops Going Strong

The mishmash of cucumber, melons, watermelons, zucchinis, pattypans, ornamental gourds, and pumpkins that I started a few days ago a week ago (thanks blogger for making my original post disappear) are already going strong...lots of roots poking out of the peat pellets and healthy cotyledons. Come to think of it, I should probably space the peat pellets out a bit before they start growing into one another.


Peat pellets are great for air circulation, but the roots can easily invade neighboring pellets if allowed.
Gourd and watermelon seedlings

May 8, 2011

Starting Squashy Crops

I put my first seedlings in the ground this weekend (mizuna and cilantro)! I also direct sowed snow peas, daikon radish, lettuce, spinach, and onion sets.

On top of that, I also started all my squashy-crops (pumpkin, watermelon, melon, zucchini, scallopini, cucumber, and ornamental gourd) and some fava beans and cat grass.

Mizuna

Cilantro

A variety of cucumbers, and squashes sown into peat pellets for easy transplanting.


April 29, 2011

My Seed Starting Area

Far Left: brassicas; Middle: tomatoes; Right: cacti and herbs.

My seed starting area in the basement is filling up fast! Now that I have my peppers, tomatillos, eggplant, groundcherries, and tomatoes all potted-up, lighted space is at a premium (especially because one of my five shop lights stopped working all of a sudden). Next weekend I will be starting gourds, pumpkins, cucumbers, and zucchinis, so I'm going to need a lot more space, and fast! Maybe I'll have to break down and buy two more shop lights (one to replace the broken one, and the other to maintain my 1-new-shop-light- per-year growth pattern that's been going on the last few years).

Left: perennial flowers and cilantro; Right: peppers, tomatillos, eggplants, ground cherries, and more perennial flowers (in humidity dome).

April 26, 2011

Transplanting Tomatoes

After two weeks in their communal trays, my tomato seedlings were ready to transplant. I started about 220 seeds and I will be keeping about 105 plants. It's a good thing I started so many extra seeds because I had some pretty erratic germination in a few cultivars (namely Taxi, Principe Borghese, and Matt's Wild Cherry). The excess seeds that did germinate are being donated to a Professor in my department. Hopefully they will find homes in one of three places: 1) his garden, 2) the demonstration vegetable garden, or 3) my local community development association for one of their many new community gardens. It's nice to know that these seedlings won't just be tossed out!

Lots of baby tomatoes!
Halfway done transplanting in this 50-cell tray.
I also transplanted about 9 cells of eggplant 'Black Beauty' and 9 cells of ground cherry 'Pineapple Tomatillo'. Post-transplant, my single tray of crammed-together seedlings now take up about three times as much space...hopefully I can find enough space under my light setup for them all!

April 18, 2011

Starting Perennial Flower Seeds

This was a slow week for starting vegetable seeds (nothing seems to need to be sown ~5 or 6 weeks before last frost), so I took the opportunity to start some perennial flower seeds. Every year I intend to start some perennials from seed mid-summer for planting out in the fall, but I always get too busy and forget. This year I decided I'd just get them sown now while I'm thinking about it. Unfortunately, that means I'll have a little less space under my grow lights for vegetables.

Here's what I started today:
  1. Lupine 'Tutti Fruitti' (this one is supposed to flower the first year)
  2. Lupinus Perennis (a spectacular blue, wild lupine)
  3. Hollyhock 'Country Romance' (I've always wanted some yellow hollyhocks. This is one of the few mixes I've found with yellows)
  4. Columbine mix
  5. Foxglove 'Excelsior Hybrid' 
I also started some herb seeds a few days ago (parsley and oregano) and some fennel seeds.

April 12, 2011

Transplanting Peppers and Tomatillos

After about 2 weeks in their starter trays, my peppers and tomatillos were ready to transplant into cell packs. I was pleased by how well they had rooted out. 


Quick Tip: When transplanting seedlings, always pick them up with the cotyledons, not by the stem. While they can survive with a torn cotyledon, they cannot survive with a broken or crushed stem.


If you start your seeds in a "communal" seed tray, carefully tease apart the individual seedlings using a pencil or other pointed instrument.


March 28, 2011

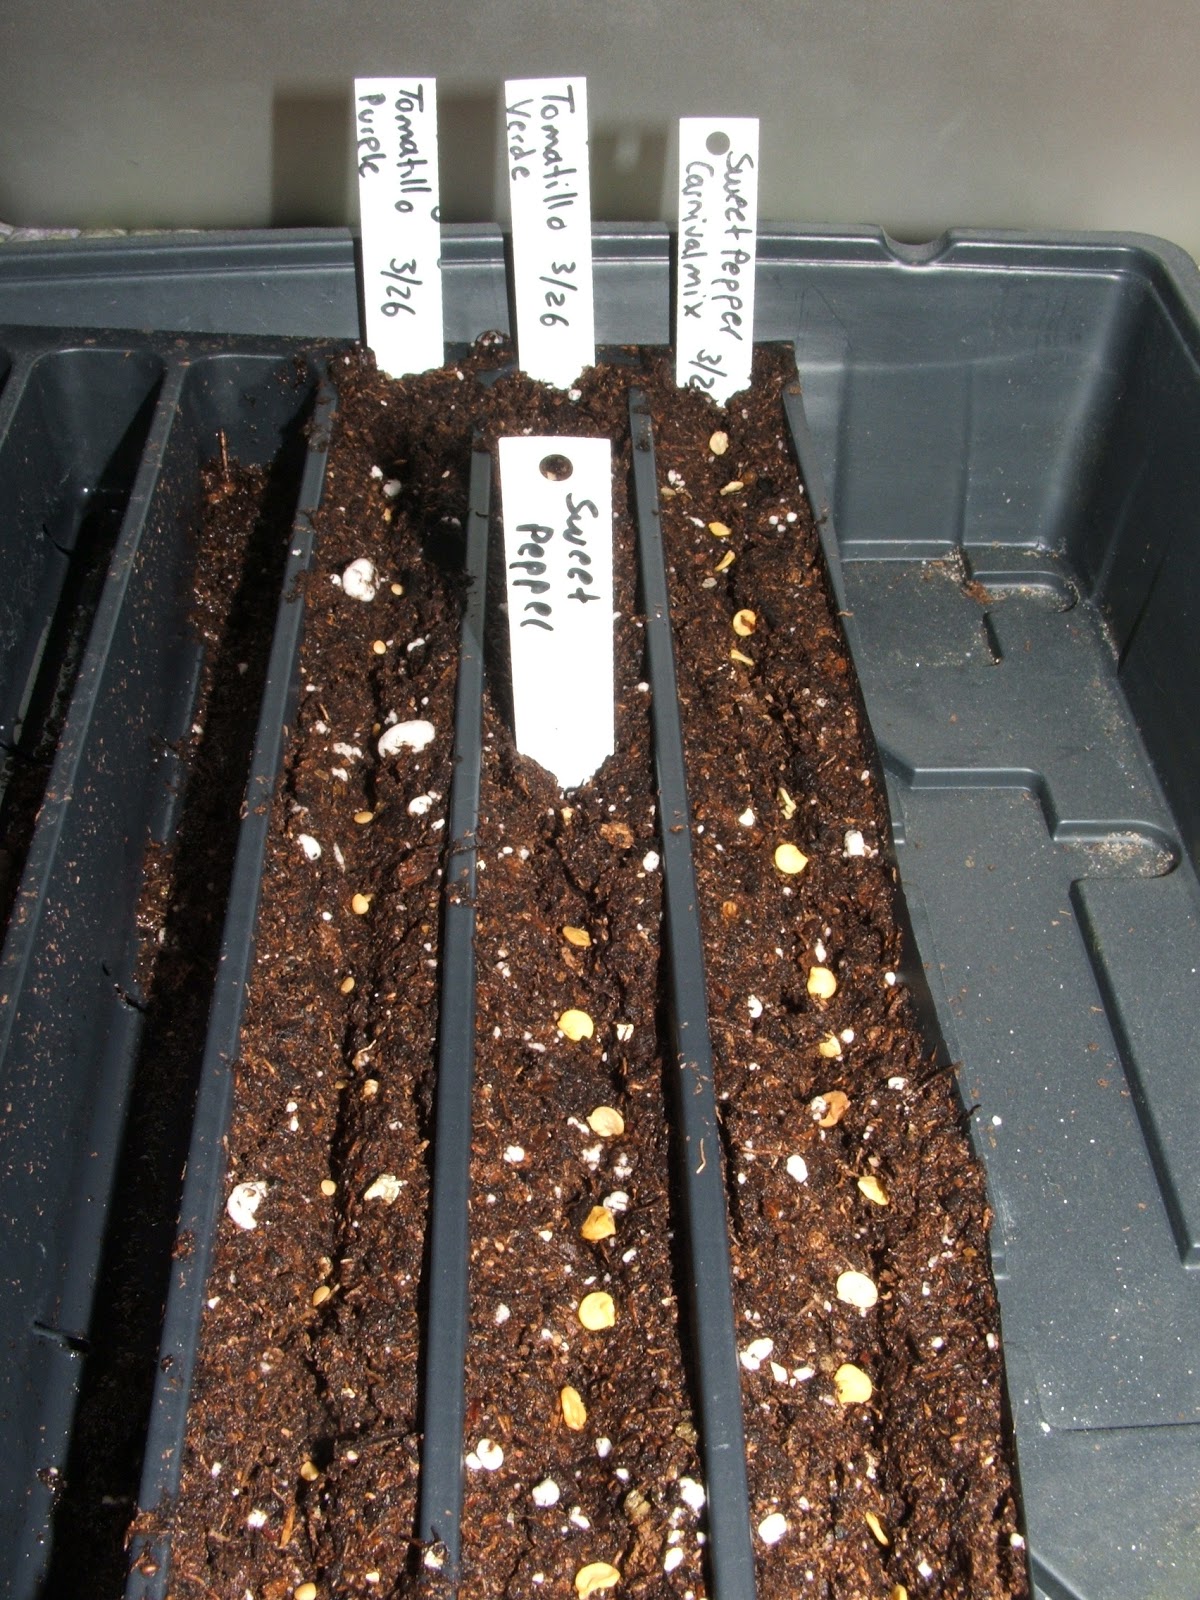
Starting Peppers and Tomatillos

This past weekend I started all the seeds that need to be sown 9 weeks before last frost. For me, this included swiss chard, sweet peppers, and two kinds of tomatillos. Normally, peppers and tomatillos would be grouped together with the tomatoes (to be sown 7 weeks before last frost), but I've had a really difficult time with these two crops in the past. I'm hoping my heating mat will help things along this year.

Still no sign of germination in the celeriac from last weekend. Hopefully they're coming along okay.

Next weekend I will be starting broccoli, kale, and kohlrabi. The real fun starts in two weeks when I get to start sowing my tomatoes (all 20 varieties, over 100 plants total).

I can't believe it, but I sowed the entire packet of 'Carnival Mix' sweet peppers. Assuming they all germinate, I will be inundated!
I probably only need 4 tomatillo plants, but I think I must have sown at least 30 seeds! I think I'm overcompensating because I've had trouble with tomatillos in the past. 

I have struggled with starting swiss chard indoors in the past too. Maybe these peat pellets will give me better results (or maybe direct sowing is the way to go)?

From the sounds of it, my week 9 crops will be the trickiest of them all. Maybe I'll have better luck this year. If not, I can always buy seedlings from the garden center.

Are there any crops you have a particularly difficult time with?

March 19, 2011

First Vegetable Sown for 2011

I've been patiently waiting for months (and months and months) to start sowing seeds for my vegetable garden.  Gardeners here in my part of Michigan are finally 10 weeks away from the last frost date, which means things like onions, celery, and celeriac can finally be started.

Giant Prague Celeriac sown March 19, 2011

March 16, 2011

"Little Green Aliens"

A friend of mine described my tiny cactus seedlings as "little green aliens". I'd have to agree. They do seem to resemble little alien pods. Maybe if I keep watering them they'll hatch into something cool.

My lithops seedlings seem to be doing well too. I only had 8 or 9 seeds germinate at first, but an additional 15 or so seeds germinated in the last couple days. I'm hoping that I'll be able to start distinguishing between the different varieties soon. They all just look like little green blobs at the moment.


March 14, 2011

Starting Seedlings: Hardening Off and Tranplanting

Hardening off your seedlings is a very important process. Without this acclimation period, your hard work sowing the seed and nurturing the seedlings indoors could be wasted.

Hardening off you seedlings involved placing them outside for increasing durations of time in order to acclimate the plants to increased light intensity, temperature, and wind. The light intensity and temperature of your seed starting area is probably much lower than natural conditions outdoors. If you plant a seedling directly outside without hardening off, the plant may undergo some shock which will either inhibit growth for a while, or kill the plant completely.  It is also important to protect the seedlings from freezing night temperatures that may occur prior to your transplant date.

These trays of vegetable seedlings can be easily transported inside and outside as needed.

Start hardening off your seedlings by bringing them outside and putting them in a shaded area for a few hours. Keep an eye on watering (the higher temps may dry out your plants much faster than when indoors). The next day increase the duration and light intensity. After 4 or 5 days of increasing both the time outside and the amount of sunshine, your plants should be ready to transplant.

These healthy tomato seedlings have been acclimated to full sun conditions and are ready for transplanting.

February 28, 2011

Starting Seedlings: Environmental Conditions and Ongoing Care

Now that you've sown your seeds, it's important to know a few other miscellaneous things in order to take care of the seedlings.

Watering:

Young seedlings need to be watered frequently. The smaller the pot size and warmer the temperature, the more often you'll need to water. I grow my seedlings in my basement where it is fairly cool (about 60-62 ºF), but I still have to water daily. One of the biggest mistakes is overwatering your seedlings. If your seedlings sit in soggy soil for a length of time, the roots will become oxygen starved and start to rot. These damp conditions can also promote mold growth and damping off (collapse of young stems at soil level). To avoid these problems, let the soil dry down between waterings. Water soluble fertilizers can be applied every time you water

Fertilizing:

Small amounts of soluble fertilizer can be mixed into your water and applied every time you water your seedlings (follow the package instructions). Pelleted fertilizers can be mixed into the soil or spread on top of the soil. If you want to grow organic crops, you will need to use organic fertilizer rather than synthetic fertilizer.

Air Circulation:

Good air circulation helps seedlings in two ways: 1) the mechanical movement caused by wind will promote strong and thick growth. Stocky seedlings are healthier and easier to transplant than spindly ones. 2) Air circulation will help prevent damping off of seedlings.

Temperature:

If you are starting seedling in your house, most seedlings will grow just fine at room temperature (~72 ºF). However, if you keep your house cooler than this, or you are growing in a basement (like me) or some other cool location, additional heat may be beneficial (but not necessary). Supplemental heat will hasten the development of many crops up to a certain point (but if too hot, the seedlings will dry too quickly). Extra heat is especially useful during germination for some of the warm-weather crops like tomato, pepper, and eggplant and can be supplied by electric seedling heat mats. If you grow in a cooler location and don't have a heat mat (they're expensive), your seedlings will just take a little longer to develop.

Electric heat mats help warm the soil and speed up germination.

February 26, 2011

Lithops and Cactus Seeds

I was pleasantly surprised by how fast my cactus seed order arrived from CactusStore.  I have to wait several more weeks before I can start any vegetable seedlings, but these cactus seeds can be started whenever! I was not expecting the lithops seeds to be so tiny. I had to mix them with some very fine vermiculite powder before sprinkling them onto the soil.

Dust-like Lithops seeds.
Three packets of cactus seed.
Labels for my pots
Lithops tray with vermiculite dusting.

February 25, 2011

Starting Seedlings: Sowing the Seeds and Germination

So it's finally time to start your seeds. Now what? Moisten your seed starting mix and fill your pots or cell packs. Check the instructions on your seed packets for planting depths and other useful information. For example, some seeds require light to germinate and should not be covered with seed starting mix. Most seeds, however, should be buried in the mix.

When you are ready to plant the seeds, double-check the planting depth and slip a couple seeds into each pot (the weaker seedling can be snipped off later). Make sure to label your pots (it might be a couple weeks before the seedlings start to resemble something familiar and you don't want to forget what's what). Using permanent marker, tag each pot with the crop's name and sowing date. Cheap tags can be made from strips of milk jug and stuck into the soil. I do not recommend using popsicle sticks as they can get moldy and the writing will bleed and become illegible.

Cover the newly seeded pots with plastic (a humidity dome, saran wrap, or plastic bag) to keep the humidity high and put them under your lights. If you have an electric seedling heat mat, plug it in and put your pots on top. Check your pots frequently. Mist with water if you stop seeing condensation on the inside of your plastic and water lightly if the soil starts to dry. As soon as you see any green bits popping up from the soil, take the plastic off. At this point, the seedlings fresh air and the highest light levels possible. If you keep them in the humidity dome too long, disease (such as damping off) can become a problem. Continue watering regularly and in a matter of weeks, the seedlings will be ready to transplant into the garden!
Related Posts Plugin for WordPress, Blogger...